Thursday, December 27, 2012

Happy Day


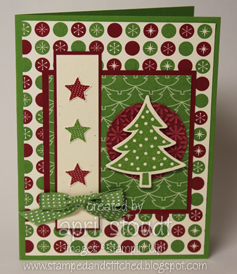
Remember this Christmas card?  I mentioned in that post that it could be varied to make a card for just about anything.  Here's one of those variations!  This was the card I made for my husband for his birthday last week.  We both have December birthdays, and since his is so close to Christmas, I needed a simple card.  This one fit the bill.  I cut the banners at an angle this time, and pushed the sentiment pieces up to the top, cutting off part of it.  Oh, and those five banners?  They were skinny scraps I had left over from the original Christmas card!  Since the paper is two sided, I just used the other side, which had more masculine (and non-Christmasy) colors.  Just some simple changes to a very simple card!

Stamps:  Friendly Phrases
Ink:  Whisper White
Paper:  Festival of Prints DSP pack, Island Indigo, Crumb Cake, and Early Espresso card stock
Accessories:  Window Frames Framelits, 7/8" cotton ribbon

I just wanted to mention that I'll be taking a short blogging break.  We're making an unexpected trip out of state and I won't have a chance to do any stamping for a while.  I'll see you 2013!

Tuesday, December 25, 2012

Merry Christmas!

I thought I'd give you a peek at the gift I made for my sister-in-law.  The adults on my husband's side of the family all draw names, but my SIL and I always do our own handmade gift exchange between the two of us.  And here's what she's getting:


I used a very old SU! set to make this.  Last year my grandparents were cleaning out, and gave me all their stamping supplies.  I know, how awesome is it that I have stampin' grandparents!?!?!  Anyway, this was one of the sets they gave me, and I've had this idea in mind ever since.  In case you're wondering where I found the paper on the panels, I hate to disappoint you...I had my husband make it for me (having a graphic designer in the family is pretty handy at times!)  I distressed it a bit, then used linen thread to sew the panels together.

I'll be enjoying the day with family at my house today, and no matter where you are or what you are doing, I hope you have a very Merry Christmas!

Monday, December 24, 2012

Merry Christmas Milk Cartons

It's Christmas Eve!  I loved this day as a child (and teenager), as it was all about family.  We would always go next door to my grandparents' house in the late afternoon, where there would be food, punch, and cousins.  It is also my grandparents' anniversary, so we would always celebrate that as well.  It is one of my favorite memories and traditions, and each year I get a little weepy at some point because I am not there with all of my family. Today my grandparents celebrate 70 years of marriage, and I am so, so grateful for the example of love and commitment they have shown (and continue to show!), and that I was able to grow up living next door to them.  They are amazing people, and I just love them so much.  Happy 70th anniversary, Grandma and Grandpa!

These little milk cartons were gifts for my stamp club members, filled with chocolate.  They are super cute and were so much fun to make.  The poinsettias on the front were so easy...I will definitely be making more of them next year!

Stamps:  Jolly Bingo Bits (tag), Got Treats (milk carton)
Ink:  Garden Green Classic Ink pad, Real Red and More Mustard markers
Paper:  Garden Green, Real Red, More Mustard,  and Whisper White card stock, Holly Berry Bouquet DSP (retired)
Accessories:  5 Petal Flower punch (retired), 1 1/4" scallop circle punch, 1" circle punch, Mini Milk Carton Die, Cherry Cobbler Baker's Twine

Friday, December 21, 2012

Christmas Banners

This card is the last of the year's Christmas Stamp-a-Stack cards.  And this is the perfect card to make if you have lots of scraps left over from other projects. You could vary the size of the banners, if you have narrower strips of paper...you could even add a couple more.  The simplicity of this card is what makes me love it.  Two layers of card stock cut with the Window Frames have paper-piercing along the edges.  The guide in the Festive Paper-Piercing Pack makes that so simple!  The sentiment is embossed with Early Espresso embossing powder, and it's all topped off with a bit of ribbon, tied in a knot and adhered with a glue dot.  So simple!  This layout could be used for just about any type of card, depending on paper and sentiment choice.  I'll definitely be making more of these in the future!

Stamps:  Occasional Quotes (retired)
Ink: VersaMark
Paper:  Festival of Prints DSP pack. Very Vanilla, Lucky Limeade, and Crumb Cake card stock
Accessories:  paper snips, Festive Paper-Piercing Pack, mat, and tool, quilted satin ribbon (retired)...I also made some of these with seam binding ribbon, which is great for cards that are being mailed.

Wednesday, December 19, 2012

Stitched Wrapping "Paper"

You may not necessarily realize it unless you know me well, but I'm a pretty crunchy girl.  And I HATE waste of any kind, not just because it's not great for the environment, but because it's not great for my wallet.  For several years, the piles of wrapping paper littering my living room on Christmas drove me crazy (not just from our immediate family, but from the extended family that gathers here later in the day.)  It seemed so wasteful, but at the same time, how does one unwrap gifts if they aren't wrapped with wrapping paper?  I thought about it and three or four years ago, decided to make a change:  cloth gift bags.  I asked my kids if they'd miss tearing into the wrapping paper, and they really didn't hesitate to say they could pretty much care less.

These are very simple bags:  three seams and a hem at the opening.  There are no drawstring closures, just an open bag.  I close them by tying a ribbon around the top.  So if you can sew a straight line, you're pretty much set and able to make these.

You may be thinking that purchasing all the fabric to make these will cost a fortune, but that doesn't have to be the case.  I didn't spend a dime on these bags.  I had piles of fabric in reds and greens that I was able to use.  Most people I know don't sew, so I tend to be given fabric on occasion.  Or perhaps my thriftiness is more commonly known than I think. ;)  If you aren't the hoarder that I am (I'm not really that bad, I promise!), you can often find fabric at thrift stores.  And while you're there, you may find old sheets, or even clothing that you can pick up inexpensively to recycle into gift bags.  It's easy to turn a shirt into a bag...many of mine were made from old uniform shirts that I had left over from an former part time job (see, now you do think that I am a hoarder.  I do tend to hang onto things that I think I'll use for something else...like gift bags!)  I even used the sleeves to turn into smaller bags.  Those were the easiest, because I didn't have to sew the sides. 

We only use these gift bags for our immediate family.  I still use wrapping paper for gifts for anyone who doesn't live in my house.  And the first year I did this, there was a mix of about half gift bags and half wrapping paper.  It took a couple of years to make enough for us to use them exclusively on Christmas, but now we're set.  Last year I picked up four rolls of wrapping paper after Christmas.  It will last us for at least another four years, unless my kids go through it more quickly.  They tend to me a bit more generous with the amounts they use than I do. :)

Monday, December 17, 2012

Gingerbread Baby


Gingerbread Baby is one of my kids' favorite books to read at this time of year, and this card reminds me of the little guy in the story.  This was one of the cards we made at the last Christmas Stamp-a-Stack.  I love the scented embossing powders that are in the Holiday Catalog, but I also wanted the easy of using the Early Espresso powder to get the brown color.  Did you know that you can combine the two to get scented, colored embossing powder?  I mixed a little bit of the sugar and spice embossing powder with the Early Espresso powder and it worked great (and smelled great, too!)

I love the Be of Good Cheer DSP, and I think the pattern shown here is my favorite one in the pack.  The Cherry Cobbler Core'dinations card stock was a perfect pairing with it, and did you know that you can stop ON the 7/8" cotton ribbon from the Holiday Catalog?  You totally can, and snipping the notch in the banner is so much easier than doing it on paper!

I have to say, this card is one of my favorites, and a few lucky people on my Christmas card list will even get this one in the mail. :)

Stamps:  Scentsational Season, Teeny Tiny Wishes
Ink:  VersaMark, Cherry Cobbler Classic ink
Paper:  Naturals Ivory, Early Espresso, Gumball Green, Very Vanilla, and Core'dinations Cherry Cobbler card stock, Be of Good Cheer DSP
Accessories:  Snowburst embossing folder (retired), Big Shot, 7/8" Cotton Ribbon, Scallop Circle punch, Holiday Collection Framelits, heat tool, Sugar & Spice embossing powder, Early Espresso Embossing powder

Saturday, December 15, 2012

Clearance Rack Blitz


I had such great intentions of posting last week, and as you can see, it didn't happen.  I guess I've been too busy stamping! I have tons of pictures on my camera, though. :)  I'm hoping to get those posted soon.

While you wait, take a look at the clearance rack...tons of new items were added, including stamps!  This is the first time Stampin' Up! has done this, so if you'd like to do some Christmas shopping for yourself or someone else, be sure to click here.

Monday, December 10, 2012

Vintage Modern

This card is a weird mix of vintage and modern.  The ribbons and button, and of course the ornament are all vintage-y, but those circles most certainly are NOT!  I was trying to use some different colors, and forced myself to use a certain sketch for the card.  So yes, it's a odd combination, but I actually really like the colors. 

Stamps:  Ornament Keepsakes, Teeny Tiny Wishes
Ink:  VersaMark
Paper:  Crumb Cake, Very Vanilla, Lucky Limeade, Soft Suede card stock
Accessories:  Lacy Brocade embossing folder,  Bitty Banner framelits, Holiday Ornaments framelits, Linen thread, Crumb Cake seam binding ribbon, Neutrals buttons, pearls

Wednesday, December 5, 2012

An Ornament Ornament

Every year, my sister-in-law asks me to plan an ornament for us to make on Thanksgiving.  And every year, we forget to make it.  I bring all the stuff to make it, leave it in the car, forget about it, and then (because we leave right from their house) proceed to cart all the supplies to my dad's house in another state.

This is this year's ornament that wasn't to be.  I have tons of scraps of various Christmas DSP left over, so this is the perfect project for that.  I cut a strip measuring 12" x 1 1/2" and then score it at every 1/4", accordion folding it along the score lines.  A bit of sticky strip hold the two ends together, as well as keeps the scallop circles attached to both the front and back.  Be sure to stick the ribbon in between those layers!  I topped it off with an embossed ornament from the Ornament Keepsakes stamp set (and matching Framelits!)  The finishing touch is the little Merry Christmas banner, complete with rhinestones at either end.  A great way to use up some scraps!

Stamps:  Ornament Keepsakes, Teeny Tiny Wishes
Paper:  Wild Wasabi, Real Red, and Very Vanilla card stock
Ink:  Versamark, Wild Wasabi
Accessories:  Simply Scored, 2 3/8" Scallop Circle punch, Holiday Ornaments Framelits, Bitty Banners Framelits, Rhinestones


Monday, December 3, 2012

Busy Christmas


I know, it's a little busy!  But it's fun.  It's hard to pick out a favorite pattern from the Be of Good Cheer DSP...it's all so great!  And the combination of Cherry Cobbler and Gumball Green is a fun combination for Christmas.  And the little Gumball Green bow is the perfect touch.

Stamps:  Merry Minis, Scentsational Season
Ink: Versamark
Paper:  Gumball Green, Cherry Cobbler, and Very Vanilla card stock, Be of Good Cheer DSP
Accessories:  Merry Minis punch pack, Holiday Collection Framelits, 2 1/2" circle punch, Snowburst embossing folder (retired), Gumball Green stitched satin ribbon


Friday, November 30, 2012

Snowy Hello

We've had snow here for most of the week, which is super unusual for us.  I've been determined not to get out the Christmas decorations until Dec. 1, but the snow and 24/7 Christmas music on pretty much every station is making it hard for me to wait.  I love Christmas, but I also love fall...I just don't see the need to rush out of one season and into the next.  But, I suppose that's exactly what I'm doing with this card, although maybe not?  I mean, there is snow on the ground here, and it's not technically a Christmas card.

This was my attempt at playing along with a Dynamic Duos challenge, but I was too late.  Can I just say that it is HARD to make a card with only two colors (plus neutrals, lest you question my math skills.)  I love the little Button Buddy snowman.  Instead of using buttons on him, I used Crystal Effects and sprinkled a little bit of Dazzling Diamonds glitter on top.  It's very subtle...so subtle that it doesn't even show up in the picture!  I stamped him with Staz-On black ink, too, so that he wouldn't bleed when I added the Crystal Effects. I actually stamped once directly on to the Marina Mist card stock, then again on white, and punched out the snow balls to add to the blue piece.  It gives him a bit of dimension and adds interest to the card.

Stamps:  Button Buddies, Teeny Tiny Wishes, Snow Swirled
Ink:  White Craft ink, Marina Mist Classic ink, and Staz-On Black ink
Paper:  Whisper White, Marina Mist, and Basic Black card stock
Accessories:  Snowburst embossing folder, Big Shot, 2 3/8" Scallop Circle punch, circle punches:  1 3/4", 3/4", and 1/2", paper-piercing tool, Crystal Effects, Dazzling Diamonds glitter, Bitty Banners Framelits, rhinestones

Wednesday, November 28, 2012

Simple Thanks


OK, one last autumn card...using Day of Gratitude, again. :)  This DSP is one of my all time favorites, and I've been hoarding it for a couple of years.  I found an old Mojo Monday sketch and gave it a try.  Just a simple card, but what gets written inside is really what it's all about, right?

Stamps:  Day of Gratitude
Ink:  Early Espresso
Paper:  Cajun Craze, Early Espresso, and Whisper White card stock
Accessories:  2 1/2", 1 3/4" and 1 3/8" circle punches, curly label punch, pearls

Tuesday, November 20, 2012

Some Stitching

I thought it was about time to share something stitched.  I actually made these skirts waaaaay back in the spring.  Recognize the fabric?  It's the Flirtatious Designer Fabric from Stampin' Up!  I have one purple-lover, and one who will always choose pink over any other color ever, so this fabric was perfect for my girls.  Since they each chose different fabrics, I only used five (maybe 6?) packs for both skirts, and had tons of the darker pink left over.  Considering it was a Sale-a-Bration selection, and ALL the fabric was free, I'd say that it was a good deal. :)  These are VERY twirly skirts, as you can see below, so a non-twirly skirt would take a lot less fabric. 

They were so excited to show off the twirliness of their skirts for the camera. :)  Oh, and in case you are wondering about sizes, I'd say that the purple is roughly a 12 (or maybe just a really long 10), and the pink is an 8, so smaller sizes would require fewer packs of fabric.

Saturday, November 17, 2012

Online Extravaganza!

Check out everything that will be on sale starting Monday!  If you were thinking of getting the Big Shot, now is the time.  What a great deal!  Oh, and don't be fooled by the name of this sale...the great prices apply to any order, not just ones placed online.


Friday, November 16, 2012

Just Believe

I'm linking up to Fab Friday again this week.  This time it's a color challenge that uses some of my very favorite colors.  I just love Cajun Craze...it might even be my absolute favorite color.  I remember when Stampin' Up! retired Really Rust.  That had been my favorite and I couldn't believe they would get rid of it.  I don't know why I was worried, though, Cajun Craze is even more beautiful.  I don't miss Really Rust at all. :)

This card uses the Just Believe stamp set...it's one I come back to time and time again.  While I was tempted to run the piece of Cajun Craze through the Big Shot with the Square Lattice embossing folder (and it would look great that way!), I decide to pull out a reeeeeeeally old set, Itty Bitty Backgrounds.  It was one of the very first sets I bought, and I don't think I'll ever get rid of it.  Since this one was retired long ago, you could achieve a similar look using the Color Spritzing Tool and a marker.  The butterflies and pearls give this card some extra dimension.

Stamps:  Just Believe, Itty Bitty Backgrounds (retired)
Ink:  VersaMark, Crumb Cake, More Mustard, and Cajun Craze markers
Paper:  Naturals Ivory, Cajun Craze, More Mustard, Crumb Cake, and Very Vanilla card stock, Comfort Cafe DSP
Accessories:   Beautiful Wings Embosslit,  Bitty Banners Framelits, pearls, sponge

Wednesday, November 14, 2012

November Club Card, Part 2


I had originally planned to use the card from last week for club, but there was something about it that didn't seem quite right to me.  Plus, it had too many layers and steps to do at club.  So I took some of the elements I loved most about that card, and used them on a new card.  I'm so happy with the result!  The medallion is exactly the same, as is the button.  In addition to those pieces, I added half of one of the flowers cut using the Floral Frames Framelits behind the piece of Early Espresso Core'dinations card stock that was embossed with the Woodgrain folder (my favorite!)  A simple banner using DSP from the Orchard Harvest pack finishes it off.

Stamps:  Day of Gratitude, Teeny Tiny Wishes
Ink:  Early Espresso, Cajun Craze, and More Mustard Classic Ink
Paper:  Naturals White, Cajun Craze, Very Vanilla, and Early Espresso Core'dinations card stock
Accessories:  Sweet Buttons Embosslits, Floral Frames Framelits, Bitty Banners Framelits, Woodgrain embossing folder, Square Lattice embossing folder, Big Shot

Friday, November 9, 2012

Day of Gratitude

So I've shown some simple cards for the past couple of days, and this one, well, doesn't fall into that category.  There's definitely a lot going on here.  But once again, I'm using the Day of Gratitude stamp set, which is one of my all time favorites.  For the image in the center, I used a variation on the rock and roll technique.  After doing the R&R, I sponged some Early Espresso ink on the edges with a sponge dauber.  It gave just enough of a contrast without getting too much dark ink on the medallion.

Oh, and have you ever wished you had a button in a certain color?  I made this one using the Sweet Buttons Embosslits, and then covered it with Crystal Effects.  It gives it a smooth shine, just like a read button.  This one is topped off with a linen thread bow.

Stamps:  Day of Gratitude, Teeny Tiny Wishes
Ink:  More Mustard, Cajun Craze, and Early Espresso Classic Ink
Paper:  Naturals Ivory, More Mustard, Very Vanilla, Early Espresso, and Cajun Craze card stock, Orchard Harvest DSP
Accessories:  Sweet Buttons Embosslits, Woodgrain and Square Lattice embossing folders, Scallop Edge punch, Very Vanilla Seam Binding ribbon, Bitty Banners Framelits, Crystal Effects, Linen Thread

Wednesday, November 7, 2012

November Club Card Part 1

Now that club has moved to Thursday night, I'm giving a sneak peak by posting on Wednesday.  And if you're in next week's club, don't look if you don't want to know what we're making!

This is another simple card using Day of Gratitude.  I love this stamp set and I love these colors. 
The texture of the squares makes the leaves pop.  And the tone on tone of the leaves and squares is simply set against the white background.  So simple, yet so pretty!

Stamps:  Day of Gratitude
Ink:  More Mustard, Cajun Craze, Old Olive, and Soft Suede Classic Ink
Paper: Naturals White, More Mustard, Cajun Craze, Old Olive, and Soft Suede card stock
Accessories:  Square Lattice embossing folder, Big Shot, 1 1/4" Square Punch

Tuesday, November 6, 2012

Thanks a Bunch

I have been so busy lately that I haven't had a lot of time to just stamp for fun.  I've been working on lots of projects, but I rarely have a chance to just sit down and stamp for the fun of stamping, with absolutely no specific end in mind.  I finally had a few minutes this afternoon and decided to use the Fab Friday sketch for this week.  I've never linked to a challenge before, but I'm hoping to do it a lot more in the future!

I used the cracked glass technique on the center image.  I'm sad that Stampin' Up! no longer sells the embossing powder needed for this technique. :(  Fortunately, I still have a little stash of it to pull out occasionally.  I really like this sentiment from the Friendship Preserves set, and I don't use it nearly enough.  Hopefully it will carry over to the main catalog!

Stamps:  Friendship Preserves
Ink:  Cajun Craze, Always Artichoke, More Mustard, and Early Espresso markers, VersaMark
Paper:  Early Espresso Core'dinations,  Naturals Ivory, Cajun Craze, More Mustard, Very Vanilla card stock
Accessories:  Window Frames Framelits Collection, Big Shot, Festive Paper-Piercing Pack, Paper-Piercing Tool and Mat, Linen Thread, Always Artichoke Seam Binding Ribbon, Woodgrain embossing folder, Glassy Glaze embossing powder, heat tool

Monday, November 5, 2012

Fall Wreath

Here's a simple card for today.  I've seen lots of different cards using the leaves from Day of Gratitude to make a wreath, and thought I'd go ahead and do it too.  The wreath is just the right element to fill up this simple card.


Stamps:  Day of Gratitude, Falling Leaves (retired)
Ink:  More Mustard, Cajun Craze, Soft Suede, and Old Olive Classic Ink
Paper:  Soft Suede, Ivory Naturals, and Very Vanilla Card Stock
Accessories:  Crochet Trim

Saturday, November 3, 2012

Give Thanks Board


How fun is this board?  Some friends and I made these last weekend.  Each day has a piece of card stock in a pocket, and on that card stock, you write what you are thankful for that day.  There are several ways to do it, but our family is writing the date and year, and then each of us is writing what we're thankful for. Well, I'm writing it...I really should have my kids' handwriting on this, but I also want to conserve space.  I probably need to lighten up and just have them do it.  There is no way I can regret having my kids' handwriting preserved in this way from year to year.  OK, I just talked myself into it! :)

I'd love to say that this board was all my idea, but it wasn't.  This is just my variation on this one.  I used all Stampin' Up! products (of course!) and instead of using plywood, I used fabric to cover a piece of foam board.  It's much easier to hang up because it's so light.  I'm hoping this is a great new tradition for our family.

Friday, November 2, 2012

Back Soon!

Sorry for the long silence.  We were without power because of Hurricane Sandy, and since my stamping space is in the (very dark) basement, I couldn't even be creative while we waited for the power to come back on.  Thankfully, we had no damage from the storm, and only had to deal with the inconvenience of having no electricity.  My heart goes out to those who are dealing with so much worse. 

I'm hoping to be back tomorrow to show you a really cool project I made with some friends last Friday night. 

Sunday, October 28, 2012

BIG SALE!

Stampin' Up! is having a ONE DAY stamp sale!  For one day only, you will get 15 percent off almost every stamp they sell!  This offer begins at 12:00 AM (MT) and lasts until 11:50 PM (MT) on Monday, October 29, 2012.
This means all stamps in the current catalogs including:
    • Background stamps
    • Personalized name stamps
    • Incentive stamp sets from the supply list
    • Cookie press stamps
    • Single-image stamps
This DOES NOT include
    • Hostess sets
    • Bundled stamp sets
    • Digital stamp brush sets
There is no minimum purchase, and no limit to the number of stamps you can order.  To place an order, contact me, or order through my site.


And in addition to this fabulous sale, Stampin' Up! is also having a week-long celebration of Digital Scrapbooking Day!  This means FREE downloads, and 50% off all digital kits.  To order any of the discounted kits, visit my website here.

Item Designer Kit Retail Value Sale Price
50% Off
130861 Afternoon Daydream Kit $9.95 $4.97
129928 Afternoon Tea II Kit $9.95 $4.97
119839 Always Elegant Digital Kit $9.95 $4.97
129358 Attic Boutique Kit $9.95 $4.97
122175 Autumn Spice Digital Kit $9.95 $4.97
127600 Autumn Traditions Kit $9.95 $4.97
130969 Bandstand Kit $7.95 $3.97
130970 Be of Good Cheer Kit $7.95 $3.97
123728 Celebrations Digital Kit $9.95 $4.97
130982 Chevron Punch Kit $7.95 $3.97
123956 Christmas Cheer Digital Kit $9.95 $4.97
120880 Christmas Cocoa II Digital Kit $9.95 $4.97
127362 Convention 2011 Digital Photo Kit $9.95 $4.97
128876 Day in the Life Kit $14.95 $7.47
130059 Fifty Nifty Kit $9.95 $4.97
130062 File it Fun Kit $7.95 $3.97
131228 Friendship Preserves Kit $3.95 $1.97
128875 Frosty Days II Kit $9.95 $4.97
129924 Get it Done Kit $5.95 $2.97
129870 Good Times II Kit $7.95 $3.97
118465 Happy Birthday Digital Kit $14.95 $7.47
128872 Holiday Harmony Kit $7.95 $3.97
127773 Holly Berry Bouquet $9.95 $4.97
118466 Hoppy Memories Digital Kit $14.95 $7.47
128999 It's all Me Kit $9.95 $4.97
130850 Joyful Times Kit $9.95 $4.97
124230 Just Add Cake Digital Kit $14.95 $7.47
124446 Leadership 2011 Digital Kit $9.95 $4.97
124568 Leadership 2011 Digital Photo Kit $9.95 $4.97
124443 Love Birds Digital Kit $9.95 $4.97
131231 Lovely Little Labels Kit $7.95 $3.97
129359 Mixed Bunch Kit $7.95 $3.97
119978 My Sweet Pea Digital Kit $9.95 $4.97
132264 Neon Notes Kit $9.95 $4.97
129898 New Heights Kit $7.95 $3.97
122174 Nite Owl Digital Kit $7.95 $3.97
129340 Number One Kit $9.95 $4.97
129360 On the Go Kit $9.95 $4.97
124463 One Great Year Kit $9.95 $4.97
131360 Ornament Keepsakes Kit $6.95 $3.47
127599 Party Animal Kit $9.95 $4.97
131226 Picture This Kit $4.95 $2.47
130851 Pinwheels on Parade Kit $7.95 $3.97
126027 Playful Polka Dots Digital Kit $9.95 $4.97
131227 Providences of Provinces Kit $7.95 $3.97
130983 Raspberry Splash Kit $7.95 $3.97
118869 Recipes By Design Digital Kit $9.95 $4.97
127163 Red, White, and Blue Digital Kit $5.95 $2.97
130060 Season By Season Kit $9.95 $4.97
127587 Sending Glad Tidings Designer Tags Kit $7.95 $3.97
129605 Special Delivery Bright Kit $7.95 $3.97
129606 Special Delivery Subtle Kit $7.95 $3.97
127759 Spice Cake Kit $5.95 $2.97
130852 Spring Break II Kit $9.95 $4.97
129608 Spring Fever Kit $7.95 $3.97
130076 Summer Happiness Kit $9.95 $4.97
118464 Summer Home Digital Kit $14.95 $7.47
129601 Summer Smooches Kit $9.95 $4.97
124229 Sunset Serenade Digital Kit $5.95 $2.97
129339 Sweet Shop Kit $9.95 $4.97
129882 Tea Time II Digital Kit $7.95 $3.97
132190 That's a Wrap Kit $7.95 $3.97
127431 Tickets & Tags Kit $9.95 $4.97
125757 Tickets & Tokens II Digital Kit $7.95 $3.97
131217 Topsy-Turvey Celebration Kit $9.95 $4.97
121071 Travel Journal Digital Kit $9.95 $4.97
126022 Travel Log Kit $9.95 $4.97
129332 Twitterpated Kit $9.95 $4.97
129607 Walk in the Park Kit $9.95 $4.97
132567 Winter Wonders Kit $9.95 $4.97
127609 Wicked Fun Kit $9.95 $4.97
131218 Wonderfall Kit $7.95 $3.97
120881 Write Stuff II Digital Kit $9.95 $4.97
128883 You're My Sunshine Kit $7.95 $3.97


Wednesday, October 24, 2012

Elegant Ornament

I love the simplicity of this card.  And by using Framelits and the coordinating stamp sets, making this card is simple, too!  There is a lot of Big Shot action going on here, considering the ornament requires three cuts of the image.  The medallion behind the ornament was also cut with Framelits, and the background was done by using the Lacy Brocade embossing folder.  How did I ever make cards without the Big Shot?  It's kind of funny, because when Stampin' Up! first introduced it, I thought, "Why on earth would I spend that kind of money on that?!?"  I finally bit the bullet and bought it, and I'm not sure I've made a card without it since.  I love my Big Shot!

Stamps:  Ornament Keepsakes, Daydream Medallions
Ink:  Lucky Limeade, Cherry Cobbler
Paper:  Lucky Limeade and Very Vanilla card stock, Festival of Prints DSP
Accessories:  Floral Frames and Holiday Ornaments Framelits, Cherry Cobbler seam binding ribbon, rhinestones, Lacy Brocade embossing folder

Monday, October 22, 2012

Sparkly Snowflakes

 This is such a simple card, and I think the simplicity is what makes it so pretty.  Using the Snow Swirled stamp set, I stamped random snowflakes in Lucky Limeade, Cherry Cobbler, and Champagne Shimmer paint along the left side of the card, leaving the right hand side unstamped.  The strip of Lucky Limeade ruffled ribbon separates the two sides, emphasized with a simple bow above the oval sentiment.  I love the use of the oval Designer Frames embossing folder here, and I highlighted the embossed frame with a bit of shimmer paint lightly sponged over the raised pattern.

Stamps:  Snow Swirled
Ink:  Lucky Limeade, Cherry Cobbler, and Early Espresso Classic Ink, Champagne Shimmer Paint
Paper:  Lucky Limeade, Cherry Cobbler, and Very Vanilla card stock
Accessories:  Designer Frames Embossing Folder, Extra-Large Oval punch, Lucky Limeade Ruffled Ribbon, sponge dauber

Friday, October 19, 2012

October Club Card #2

Have I mentioned before that I love leaves?  I could make cards that feature leaves and fall colors all year long.  The Gently Falling stamp set is a perfect pairing with the woodgrain embossing folder.  To make the woodgrain really stand out, we sponged a bit of Soft Suede ink on the embossed card stock, working against the grain.  The piece of more mustard card stock was spritzed with the Color Spritzing Tool and then crumpled up.  It's not visible in the picture, but the leaves have a bit of sparkle to them.  I made my own shimmer spritz using rubbing alcohol and a few drops of shimmer paint.  It was so easy to make, and even easier to use!

Stamps:  Gently Falling, Tiny Tags
Ink:  Soft Suede, Cajun Craze, and More Mustard Classic Ink
Paper:  Cajun Craze, Soft Suede, More Mustard, and Very Vanilla card stock
Accessories:  Crochet Trim, Linen Thread, Woodgrain embossing folder, Jewelry Tag punch, Color Spritzing Tool

Tuesday, October 16, 2012

October Club Card #1


I'm not really much of a Halloween person, but I do love fall.  And fall means pumpkins.  These little pumpkins are so easy to make.  Just pick out a circle or oval punch, punch out three pieces, then with a little adhesive, stick them together.  So simple.  I did pop up the center piece with a Stampin' Dimensional, and sponged the edges a bit to give the layers a bit more dimension.

Stamps:  Teeny Tiny Wishes, Button Buddies
Ink:  Early Espresso, Old Olive, and Pumpkin Pie Classic Ink
Paper:  Crumb Cake, Very Vanilla, and Pumpkin Pie card stock, Early Espresso Core'dinations card stock
Accessories:  Labels Collection Framelits, Woodgrain embossing folder, Large Oval Punch, Small Oval Punch, 3/4" Circle Punch, sponge

Wednesday, October 10, 2012

Candy Dish

I made this cute little candy dish on Saturday so we could have a fun way to eat our treats at the Stamp-a-Stack on Sunday.  Because fall colored M&Ms should really be housed in a cute fall-ish container.  :) I guess it's not actually a little candy dish...it's actually not little.  It's made from a full piece of 12x12 card stock, so the bottom and the sides all measure 4" square. 
Here's a view from the top.  I just tied a bunch of different ribbons around the top to make it pretty.  It was so easy to make...I was actually surprised at how quickly I was able to follow these directions and put it together. 

Stamps:  Day of Gratitude
Ink:  Old Olive, More Mustard, and Cajun Craze
Paper:  Autumn Spice DSP (retired), Cajun Craze 12x12 card stock, Early Espresso Core'dinations and Very Vanilla card stock
Accessories:  Early Espresso 1/8" taffeta ribbon, Crochet Trim, Lucky Limeade Ruffled Ribbon, More Mustard 1/4" grosgrain ribbon

Speaking of the Stamp-a-Stack on Sunday, I'll have those cards coming up later this week.  And if you're interested in coming to our last Christmas Card Stamp-a-Stack on Dec. 2, just let me know!

Wednesday, October 3, 2012

Single Stamps!


If you've always wished you could purchase just one sentiment from a stamp set, it's your lucky day! 
Stampin' Up! is trying out something new! We now have the chance to buy single pieces from these select stamp sets: Word Play, Perfectly Penned, and Seasonal Sayings. The offer will be available now through January 2, 2013.
  • These stamps are available on any order type-customer, demonstrator, workshop, or online. 
  • You can find the stamp item numbers on the flyers:
     Single Stamps: Word Play
     Single Stamps: Perfectly Penned
     Single Stamps: Seasonal Sayings
  • These won't be sent to you in our typical cases or packaging; they'll be packaged in cello bags. If you'd like a case for your stamp, you can buy our Clear-Mount Stamp Cases that come in packs of four (item 119105).
  • This offer is available for clear-mount stamps only.
  • The stamps won't come with a Clear-Mount Block, and you'll need to buy a block separately if you don't already have one. The recommended block sizes can be found on the flyers. 
  • There's no limit on how many pieces you can buy.
  • Remember that this is a pilot program, so take advantage of it while you can!


Monday, October 1, 2012

October promotion

If you've been thinking about getting the Ornament Keepsakes set, now is the time!  To place an order, call or email me, or click here to place your order.

Friday, September 28, 2012

A Basket of Mums

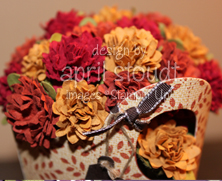
I went digging in the archives for this one. :)  Actually, it's never been posted here, just on my official Stampin' Up! website.  Back when I originally made this, I entered this project in a contest on Shelli Gardner's blog, and was honored to have been selected as a winner!  And since it is one of my all time favorites, I decided to post it here. 


Fall is my favorite time of year and I've been having so much fun playing with all the gorgeous new colors Stampin' Up! introduced this year.  Cajun Craze, Cherry Cobbler and More Mustard are the perfect fall colors.  I wanted to come up with something that was unusual, but very fall-like.  I was inspired by the gigantic mum that is planted by my front door.  I haven't ever seen anyone make mums, so I was on my own to come up with a way to do it (although surely someone has figured this out before me!)  I'm so pleased with the way the flowers turned out!

To make the mums, I punched three petals with the Boho Blossoms punch for each flower.  I then used the faux suede technique to end up with six layers.  I popped a brad through all six layers, then fluffed up each layer around the brad.  It's that simple!

 I used the Baskets and Blooms die and my Big Shot to cut out the basket, as well as the Jewelry Tag punch for the little tags.  I love that punch!  To get the word "Blessings" on the tag, I used a Stampin' Write marker to color the single word from one of the stamps in the Falling Leaves set.  After stamping the word, I punched out the tag.

I hope you enjoyed this blast from the past.  This is one of my favorite fall decorations, and I really need to get it out this weekend!  Who am I kidding...I need to ask my husband to go to the attic and get the big box of decorations down for me. :)

Thursday, September 27, 2012

Side Step Card

This is a card I made last year, and even though the DSP is retired, it was too beautiful a card not to show.  I hope that doesn't sound arrogant...I was just really, really pleased with how this card turned out.  I love the Gently Falling stamp set.  I pretty much love any set that has leaves in it, but this one is unlike any other leaf set I own (and I own a lot of them!)  After stamping the leaves, I used some shimmer paint on them, and a really cool thing happened.  I wasn't expecting it, but the leaves sort of curled up on the edges.  That might normally upset me, but on this card, it adds a more realistic look to the leaves, and they are just beautiful.  I sponged the edges of all the paper, including the Crumb Cake card stock that's behind the DSP.  In fact, I did such a thorough job of sponging the edges that you can't even tell the Crumb Cake is there!

This isn't the greatest shot, but I wanted to show you what the inside looks like.  When making a card like this, there is a lot of space on the side that you can't really use to write on, because of all the score lines.  Well, I guess you could, but I would find that kind of annoying! :)  So I stamped three leaves long that side to fill the space and added the sentiment.

Stamps:  Gently Falling, Four Frames
Ink:  Soft Suede, More Mustard, Old Olive, Baja Breeze
Paper:  Soft Suede, Very Vanilla, Baja Breeze card stock
Accessories:  Decorative Label Punch, Linen Thread, Pearls, Frost White Shimmer Paint, sponge, sponge dauber 

Monday, September 24, 2012

SAS Christmas Ornaments

I've had fun playing with the Ornament Keepsakes set from the Holiday catalog.  I'm not really a vintage kind of girl, but I know it's a very popular look right now, and I've slowly been forcing myself to move out of my comfort zone and make some vintage cards.  I was really happy with how this card came out, especially since it combines my normal preference of bold images with a vintage-y look.
I loved how this card turned out!  The ribbon, the shimmer paint, the Core'dinations card stock, the pearls...all so pretty.  I especially loved the little tags.  But it was kind of a lot, especially for a Stamp-a-Stack.  It's one thing to make one of these, but to have several people making five?  I knew it would end up taking all afternoon just to do this one card.  So I sat down and tried to rework it, and I ended up loving the new card even more!  Many of the elements are the same, such as the shimmer paint that's covering the ornament and most of the card surface.  The ribbon and linen thread are still there, just altered a bit.  And I love the addition of a bigger piece of Crumb Cake card stock.

Stamps:  Ornament Keepsakes, Christmas Greetings (retired)
Ink: VersaMark, Early Espresso, Crumb Cake
Paper:  Cherry Cobbler, Very Vanilla, and Crumb Cake card stock
Accessories:  Linen Thread, Crumb Cake and Cherry Cobbler Seam Binding ribbon, sponge, Holiday Ornaments Framelits, Pearls, Lacy Brocade embossing folder, Big Shot, Champagne Mist shimmer paint, sponge dauber


Friday, September 21, 2012

Stamp-a-Stack Christmas Card

This is one of the cards we made at our Stamp-a-Stack on Sunday.  Stampin' Up!'s glimmer paper and colored embossing powder make such a bold statement on this card.  It's such a fun card, and goes together so quickly because of all the punches that are used for the circles.


Stamps:  Scentsational Season, Teeny Tiny Wishes
Ink:  VersaMark, Cherry Cobbler Classic ink pad
Paper: Naturals White, Whisper White, and Gumball Green card stock, Red and Silver Glimmer paper, Be of Good Cheer DSP
Accessories:  Cherry Cobbler Baker's Twine, 2 1/2" Circle punch, 3/4" Circle punch, Itty Bitty Shapes Punch Pack, Rhinestones, Holiday Framelits Collection, Gumball Green embossing powder, heat tool

Wednesday, September 19, 2012

September Club Cards, Part 2


This month was all about non-traditional sized cards, so this one is a square card.  It was a simple as can be, with banners making up most of the layers.  The circles were easy to create with punches, and the little apple and stem from Perfectly Preserved are precisely cut with the Cannery Framelits.  This card also features two different types of woodgrain:  the green circle was stamped with the Timber wheel, and the Early Espresso banner was run through the Big Shot with the Woodgrain embossing folder.  The woodgrain pops out because I lightly sanded the Core'dinations card stock.  I love this stuff with this embossing folder!  They are perfect together!

Stamps:  Perfectly Preserved, Teeny Tiny Wishes, Timber wheel
Ink:  Raspberry Ripple and Early Espresso markers, Lucky Limeade Classic ink pad
Paper:  Naturals Ivory, More Mustard, and Lucky Limeade card stock, Orchard Harvest DSP, Early Espresso Core'dinations card stock
Accessories:  2 3/8' scallop circle punch, 1 3/4" circle punch, Cannery Framelits, Woodgrain embossing folder, paper-piercing tool and mat

Monday, September 17, 2012

September Club Cards, Part 1

So apparently I need to start every Monday post with an apology!  YIKES!  I can't believe how quickly the days are going by, and before I know it, another week has passed and I've only posted once!  I thought July was always our busiest month, but I'm now starting to think it's September.  Talk about CRAZY!  I'd like to think that things will settle down a bit in the next few weeks, but I'm not sure my calendar agrees.

There's been lots of stamping this past week, though, with club on Wednesday night, and the first of our Christmas Card Stamp-a-Stacks yesterday.  Even with a small group, it was a great afternoon, and lots of fun.  Those cards will be coming later in the week, as well as a peak at the cards for the remaining two Stamp-a-Stacks.

But first, here's one of the cards we made on Wednesday night.  This one is a telescoping card.  I've been seeing lots of these lately, and wanted to give it a try.  We used Button Buddies, since that's my latest obsession.  I wanted it to be simple, since there were a lot of us making this at once.  But the simplicity is nice with this card, because of all the layers. 

I think this would be the perfect technique to use for a snowman card.  But it's only September...no talk of snow or snowmen yet!

Stamps:  Button Buddies, Day of Gratitude
Ink:  Crumb Cake, Early Espresso, More Mustard, and Cajun Craze Classic Ink
Paper:  Crumb Cake, Early Espresso, More Mustard, Cajun Craze, and Very Vanilla card stock
Accessories:  Scallop Circle Die, 3 1/2" Circle Die, 3" Circle Die, 2 3/8" Scallop Circle Punch, 1 3/4" Circle Punch, 1 1/4" Circle Punch, Brights Buttons, Linen Thread, Sponge, Silver Brads, Paper-Piercing Tool and Mat


Monday, September 10, 2012

Simple Snail

I feel like apologies are needed for so many reasons...I meant to post this on Friday, but we were scurrying around packing to leave to go to my cousin's wedding.  We were two hours into the trip when I realized that I hadn't posted it.  That was also around the time when my daughter announced that she had not packed shoes to wear to the wedding.  I got to make a trip to the mall on Saturday morning to find some sandals for her.  The good news about that was that we did find a pair, and they were 50% off the clearance price! Hooray for good deals!  And, I should add, the wedding was lovely.  He was the last of all my cousins to get married, and I'm so happy for them! 

My other apology is for the photography.  There is a really cool element on this card, and the poor photography really doesn't show it off.  This little snail is from the Button Buddies set.  I love how each image works well alone, but looks even better with a button on top.  But what do you do if you don't have the right colored button?  This was the question I was asking myself, because there are no Tangerine Tango buttons.  The simple solution is Crystal Effects.  I simply stamped onto a piece of Tangerine Tango, punched out the shell part of the snail using the 3/4" circle punch, then used Crystal Effects on top.  The CE takes awhile to dry, so be sure to do that first, and be prepared to set it aside for a while and go fold some laundry.  Or, if you are lucky enough not to have clothes waiting in your dryer, you can just make more cards while you wait. :)

While it might be tempting to do the Crystal Effects first, but it's important to do that after punching.  Once dry, the CE will make it difficult, if not impossible to fit the card stock into the punch.  Also, don't run your dry CE through your Big Shot unless you want it to be flattened.  Just ask me how I know. :)

Stamps: Button Buddies
Ink:  Tangerine Tango Classic Ink
Paper:  Floral District DSP, Naturals White, Tangerine Tango, and Lucky Limeade card stock
Accessories:  Labels Framelits Collection, Paper Piercing Tool, Pack and Mat, Lucky Limeade Ruffled Ribbon, Stripes Embossing Folder, Big Shot