Thursday, December 27, 2012

Happy Day


Remember this Christmas card?  I mentioned in that post that it could be varied to make a card for just about anything.  Here's one of those variations!  This was the card I made for my husband for his birthday last week.  We both have December birthdays, and since his is so close to Christmas, I needed a simple card.  This one fit the bill.  I cut the banners at an angle this time, and pushed the sentiment pieces up to the top, cutting off part of it.  Oh, and those five banners?  They were skinny scraps I had left over from the original Christmas card!  Since the paper is two sided, I just used the other side, which had more masculine (and non-Christmasy) colors.  Just some simple changes to a very simple card!

Stamps:  Friendly Phrases
Ink:  Whisper White
Paper:  Festival of Prints DSP pack, Island Indigo, Crumb Cake, and Early Espresso card stock
Accessories:  Window Frames Framelits, 7/8" cotton ribbon

I just wanted to mention that I'll be taking a short blogging break.  We're making an unexpected trip out of state and I won't have a chance to do any stamping for a while.  I'll see you 2013!

Tuesday, December 25, 2012

Merry Christmas!

I thought I'd give you a peek at the gift I made for my sister-in-law.  The adults on my husband's side of the family all draw names, but my SIL and I always do our own handmade gift exchange between the two of us.  And here's what she's getting:


I used a very old SU! set to make this.  Last year my grandparents were cleaning out, and gave me all their stamping supplies.  I know, how awesome is it that I have stampin' grandparents!?!?!  Anyway, this was one of the sets they gave me, and I've had this idea in mind ever since.  In case you're wondering where I found the paper on the panels, I hate to disappoint you...I had my husband make it for me (having a graphic designer in the family is pretty handy at times!)  I distressed it a bit, then used linen thread to sew the panels together.

I'll be enjoying the day with family at my house today, and no matter where you are or what you are doing, I hope you have a very Merry Christmas!

Monday, December 24, 2012

Merry Christmas Milk Cartons

It's Christmas Eve!  I loved this day as a child (and teenager), as it was all about family.  We would always go next door to my grandparents' house in the late afternoon, where there would be food, punch, and cousins.  It is also my grandparents' anniversary, so we would always celebrate that as well.  It is one of my favorite memories and traditions, and each year I get a little weepy at some point because I am not there with all of my family. Today my grandparents celebrate 70 years of marriage, and I am so, so grateful for the example of love and commitment they have shown (and continue to show!), and that I was able to grow up living next door to them.  They are amazing people, and I just love them so much.  Happy 70th anniversary, Grandma and Grandpa!

These little milk cartons were gifts for my stamp club members, filled with chocolate.  They are super cute and were so much fun to make.  The poinsettias on the front were so easy...I will definitely be making more of them next year!

Stamps:  Jolly Bingo Bits (tag), Got Treats (milk carton)
Ink:  Garden Green Classic Ink pad, Real Red and More Mustard markers
Paper:  Garden Green, Real Red, More Mustard,  and Whisper White card stock, Holly Berry Bouquet DSP (retired)
Accessories:  5 Petal Flower punch (retired), 1 1/4" scallop circle punch, 1" circle punch, Mini Milk Carton Die, Cherry Cobbler Baker's Twine

Friday, December 21, 2012

Christmas Banners

This card is the last of the year's Christmas Stamp-a-Stack cards.  And this is the perfect card to make if you have lots of scraps left over from other projects. You could vary the size of the banners, if you have narrower strips of paper...you could even add a couple more.  The simplicity of this card is what makes me love it.  Two layers of card stock cut with the Window Frames have paper-piercing along the edges.  The guide in the Festive Paper-Piercing Pack makes that so simple!  The sentiment is embossed with Early Espresso embossing powder, and it's all topped off with a bit of ribbon, tied in a knot and adhered with a glue dot.  So simple!  This layout could be used for just about any type of card, depending on paper and sentiment choice.  I'll definitely be making more of these in the future!

Stamps:  Occasional Quotes (retired)
Ink: VersaMark
Paper:  Festival of Prints DSP pack. Very Vanilla, Lucky Limeade, and Crumb Cake card stock
Accessories:  paper snips, Festive Paper-Piercing Pack, mat, and tool, quilted satin ribbon (retired)...I also made some of these with seam binding ribbon, which is great for cards that are being mailed.

Wednesday, December 19, 2012

Stitched Wrapping "Paper"

You may not necessarily realize it unless you know me well, but I'm a pretty crunchy girl.  And I HATE waste of any kind, not just because it's not great for the environment, but because it's not great for my wallet.  For several years, the piles of wrapping paper littering my living room on Christmas drove me crazy (not just from our immediate family, but from the extended family that gathers here later in the day.)  It seemed so wasteful, but at the same time, how does one unwrap gifts if they aren't wrapped with wrapping paper?  I thought about it and three or four years ago, decided to make a change:  cloth gift bags.  I asked my kids if they'd miss tearing into the wrapping paper, and they really didn't hesitate to say they could pretty much care less.

These are very simple bags:  three seams and a hem at the opening.  There are no drawstring closures, just an open bag.  I close them by tying a ribbon around the top.  So if you can sew a straight line, you're pretty much set and able to make these.

You may be thinking that purchasing all the fabric to make these will cost a fortune, but that doesn't have to be the case.  I didn't spend a dime on these bags.  I had piles of fabric in reds and greens that I was able to use.  Most people I know don't sew, so I tend to be given fabric on occasion.  Or perhaps my thriftiness is more commonly known than I think. ;)  If you aren't the hoarder that I am (I'm not really that bad, I promise!), you can often find fabric at thrift stores.  And while you're there, you may find old sheets, or even clothing that you can pick up inexpensively to recycle into gift bags.  It's easy to turn a shirt into a bag...many of mine were made from old uniform shirts that I had left over from an former part time job (see, now you do think that I am a hoarder.  I do tend to hang onto things that I think I'll use for something else...like gift bags!)  I even used the sleeves to turn into smaller bags.  Those were the easiest, because I didn't have to sew the sides. 

We only use these gift bags for our immediate family.  I still use wrapping paper for gifts for anyone who doesn't live in my house.  And the first year I did this, there was a mix of about half gift bags and half wrapping paper.  It took a couple of years to make enough for us to use them exclusively on Christmas, but now we're set.  Last year I picked up four rolls of wrapping paper after Christmas.  It will last us for at least another four years, unless my kids go through it more quickly.  They tend to me a bit more generous with the amounts they use than I do. :)

Monday, December 17, 2012

Gingerbread Baby


Gingerbread Baby is one of my kids' favorite books to read at this time of year, and this card reminds me of the little guy in the story.  This was one of the cards we made at the last Christmas Stamp-a-Stack.  I love the scented embossing powders that are in the Holiday Catalog, but I also wanted the easy of using the Early Espresso powder to get the brown color.  Did you know that you can combine the two to get scented, colored embossing powder?  I mixed a little bit of the sugar and spice embossing powder with the Early Espresso powder and it worked great (and smelled great, too!)

I love the Be of Good Cheer DSP, and I think the pattern shown here is my favorite one in the pack.  The Cherry Cobbler Core'dinations card stock was a perfect pairing with it, and did you know that you can stop ON the 7/8" cotton ribbon from the Holiday Catalog?  You totally can, and snipping the notch in the banner is so much easier than doing it on paper!

I have to say, this card is one of my favorites, and a few lucky people on my Christmas card list will even get this one in the mail. :)

Stamps:  Scentsational Season, Teeny Tiny Wishes
Ink:  VersaMark, Cherry Cobbler Classic ink
Paper:  Naturals Ivory, Early Espresso, Gumball Green, Very Vanilla, and Core'dinations Cherry Cobbler card stock, Be of Good Cheer DSP
Accessories:  Snowburst embossing folder (retired), Big Shot, 7/8" Cotton Ribbon, Scallop Circle punch, Holiday Collection Framelits, heat tool, Sugar & Spice embossing powder, Early Espresso Embossing powder

Saturday, December 15, 2012

Clearance Rack Blitz


I had such great intentions of posting last week, and as you can see, it didn't happen.  I guess I've been too busy stamping! I have tons of pictures on my camera, though. :)  I'm hoping to get those posted soon.

While you wait, take a look at the clearance rack...tons of new items were added, including stamps!  This is the first time Stampin' Up! has done this, so if you'd like to do some Christmas shopping for yourself or someone else, be sure to click here.

Monday, December 10, 2012

Vintage Modern

This card is a weird mix of vintage and modern.  The ribbons and button, and of course the ornament are all vintage-y, but those circles most certainly are NOT!  I was trying to use some different colors, and forced myself to use a certain sketch for the card.  So yes, it's a odd combination, but I actually really like the colors. 

Stamps:  Ornament Keepsakes, Teeny Tiny Wishes
Ink:  VersaMark
Paper:  Crumb Cake, Very Vanilla, Lucky Limeade, Soft Suede card stock
Accessories:  Lacy Brocade embossing folder,  Bitty Banner framelits, Holiday Ornaments framelits, Linen thread, Crumb Cake seam binding ribbon, Neutrals buttons, pearls

Wednesday, December 5, 2012

An Ornament Ornament

Every year, my sister-in-law asks me to plan an ornament for us to make on Thanksgiving.  And every year, we forget to make it.  I bring all the stuff to make it, leave it in the car, forget about it, and then (because we leave right from their house) proceed to cart all the supplies to my dad's house in another state.

This is this year's ornament that wasn't to be.  I have tons of scraps of various Christmas DSP left over, so this is the perfect project for that.  I cut a strip measuring 12" x 1 1/2" and then score it at every 1/4", accordion folding it along the score lines.  A bit of sticky strip hold the two ends together, as well as keeps the scallop circles attached to both the front and back.  Be sure to stick the ribbon in between those layers!  I topped it off with an embossed ornament from the Ornament Keepsakes stamp set (and matching Framelits!)  The finishing touch is the little Merry Christmas banner, complete with rhinestones at either end.  A great way to use up some scraps!

Stamps:  Ornament Keepsakes, Teeny Tiny Wishes
Paper:  Wild Wasabi, Real Red, and Very Vanilla card stock
Ink:  Versamark, Wild Wasabi
Accessories:  Simply Scored, 2 3/8" Scallop Circle punch, Holiday Ornaments Framelits, Bitty Banners Framelits, Rhinestones


Monday, December 3, 2012

Busy Christmas


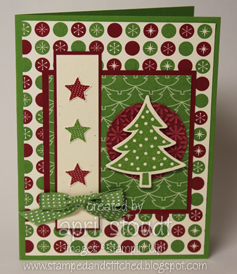
I know, it's a little busy!  But it's fun.  It's hard to pick out a favorite pattern from the Be of Good Cheer DSP...it's all so great!  And the combination of Cherry Cobbler and Gumball Green is a fun combination for Christmas.  And the little Gumball Green bow is the perfect touch.

Stamps:  Merry Minis, Scentsational Season
Ink: Versamark
Paper:  Gumball Green, Cherry Cobbler, and Very Vanilla card stock, Be of Good Cheer DSP
Accessories:  Merry Minis punch pack, Holiday Collection Framelits, 2 1/2" circle punch, Snowburst embossing folder (retired), Gumball Green stitched satin ribbon