Showing posts with label Festive Paper-Piercing Pack. Show all posts

Wednesday, January 29, 2014

Banner Birthday Card

I have another birthday card today...I always think that January is a great time for birthday cards.  I've made a couple versions of this card in the past, which you can see here and here.  I've explained how to make this super-simple card in both those posts.  Obviously, I like this card layout, so I'm sure I'll have more versions in the future!

Wednesday, January 8, 2014

Button Buddies Birthday

This is a card for a very special girl, who turned 14 yesterday.  I've known her since she was two, and it's hard for me to believe that she's really as old as she is.  I gave a similar card to her mom a few months ago, and it's still hanging on their refrigerator.  A little birdie told me that she frequently looks at the card and comments on how she wished it was hers.  So I made one that's not a duplicate, but is similar, and hopefully she loves it. 

Tips & Tricks

  • Paper piercing adds a lovely "finishing" touch to a card element, and I love that the Festive Paper Piercing Pack coordinates with Labels Framelits.  The holes are spaced perfectly, and there's no guesswork involved!
  • Don't forget the most basic of stamping techniques...using markers directly on the rubber of your stamps.  This is how I created the Rich Razzleberry vase with the Old Olive stems sticking out.  Don't forget to breathe on the stamp before stamping to moisten the ink!

Supplies

Stamps:  Button Buddies and A Little Birthday
Ink:  Rich Razzleberry and Old Olive Classic Ink, Whisper White Craft Ink
Paper:  Pacific Point, Tangerine Tango, and Whisper White card stock, Summer Smooches Designer Series Paper
Accessories:  Big Shot, Labels Collection Framelits, Festive Paper Piercing Pack, Paper Piercing Tool and Mat, Daffodil Delight Taffeta Ribbon, Buttons, White Baker's Twine

Friday, July 26, 2013

How Not to Make a Card
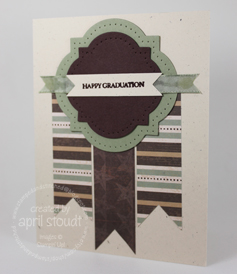
I can't even believe I'm showing this card for the world to see.  At first glance, it looks OK, right?  Yeah, not so fast.  I made one huge mistake, so let's consider this post a public service announcement of sorts.  Don't use glue under taffeta ribbon.  If you didn't notice before, I'm sure that you can now see the line of glue under the ribbon on this card.  Um, whoops.  Here's the best part...the only reason I put the ribbon there was to cover up the tops of the striped banners that were sticking out from behind the green card stock. A mistake on top of a mistake.  Nice.

Speaking of green card stock, don't get too attached.  This card is full of retired product, including that Mellow Moss card stock and the Outlaw DSP.  It's time for me to start using up my stash, and this DSP seemed like a good choice for a masculine card that I needed in a hurry (which is also why I didn't fix the ribbon/glue fiasco.)

So there you go...not the world's most beautiful card, but a functional and easy layout that I hope you'll try on your own.  Just don't use glue and taffeta ribbon.

Stamps:  Teeny Tiny Wishes
Ink:  Chocolate Chip
Paper:  Outlaw DSP (retired), Mellow Moss (retired), Chocolate Chip, and Naturals Ivory card stock
Accessories:  Big Shot, Window Frames Framelits, Paper-Piercing tool, mat, and Festive Paper-Piercing Pack, Bitty Banners Framelits, taffeta ribbon :)

Friday, December 21, 2012

Christmas Banners

This card is the last of the year's Christmas Stamp-a-Stack cards.  And this is the perfect card to make if you have lots of scraps left over from other projects. You could vary the size of the banners, if you have narrower strips of paper...you could even add a couple more.  The simplicity of this card is what makes me love it.  Two layers of card stock cut with the Window Frames have paper-piercing along the edges.  The guide in the Festive Paper-Piercing Pack makes that so simple!  The sentiment is embossed with Early Espresso embossing powder, and it's all topped off with a bit of ribbon, tied in a knot and adhered with a glue dot.  So simple!  This layout could be used for just about any type of card, depending on paper and sentiment choice.  I'll definitely be making more of these in the future!

Stamps:  Occasional Quotes (retired)
Ink: VersaMark
Paper:  Festival of Prints DSP pack. Very Vanilla, Lucky Limeade, and Crumb Cake card stock
Accessories:  paper snips, Festive Paper-Piercing Pack, mat, and tool, quilted satin ribbon (retired)...I also made some of these with seam binding ribbon, which is great for cards that are being mailed.

Tuesday, November 6, 2012

Thanks a Bunch

I have been so busy lately that I haven't had a lot of time to just stamp for fun.  I've been working on lots of projects, but I rarely have a chance to just sit down and stamp for the fun of stamping, with absolutely no specific end in mind.  I finally had a few minutes this afternoon and decided to use the Fab Friday sketch for this week.  I've never linked to a challenge before, but I'm hoping to do it a lot more in the future!

I used the cracked glass technique on the center image.  I'm sad that Stampin' Up! no longer sells the embossing powder needed for this technique. :(  Fortunately, I still have a little stash of it to pull out occasionally.  I really like this sentiment from the Friendship Preserves set, and I don't use it nearly enough.  Hopefully it will carry over to the main catalog!

Stamps:  Friendship Preserves
Ink:  Cajun Craze, Always Artichoke, More Mustard, and Early Espresso markers, VersaMark
Paper:  Early Espresso Core'dinations,  Naturals Ivory, Cajun Craze, More Mustard, Very Vanilla card stock
Accessories:  Window Frames Framelits Collection, Big Shot, Festive Paper-Piercing Pack, Paper-Piercing Tool and Mat, Linen Thread, Always Artichoke Seam Binding Ribbon, Woodgrain embossing folder, Glassy Glaze embossing powder, heat tool