Showing posts with label Button Buddies. Show all posts

Wednesday, January 8, 2014

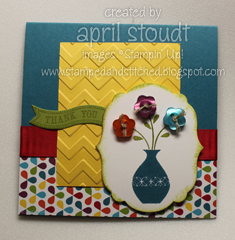
Button Buddies Birthday

This is a card for a very special girl, who turned 14 yesterday.  I've known her since she was two, and it's hard for me to believe that she's really as old as she is.  I gave a similar card to her mom a few months ago, and it's still hanging on their refrigerator.  A little birdie told me that she frequently looks at the card and comments on how she wished it was hers.  So I made one that's not a duplicate, but is similar, and hopefully she loves it. 

Tips & Tricks

  • Paper piercing adds a lovely "finishing" touch to a card element, and I love that the Festive Paper Piercing Pack coordinates with Labels Framelits.  The holes are spaced perfectly, and there's no guesswork involved!
  • Don't forget the most basic of stamping techniques...using markers directly on the rubber of your stamps.  This is how I created the Rich Razzleberry vase with the Old Olive stems sticking out.  Don't forget to breathe on the stamp before stamping to moisten the ink!

Supplies

Stamps:  Button Buddies and A Little Birthday
Ink:  Rich Razzleberry and Old Olive Classic Ink, Whisper White Craft Ink
Paper:  Pacific Point, Tangerine Tango, and Whisper White card stock, Summer Smooches Designer Series Paper
Accessories:  Big Shot, Labels Collection Framelits, Festive Paper Piercing Pack, Paper Piercing Tool and Mat, Daffodil Delight Taffeta Ribbon, Buttons, White Baker's Twine

Thursday, April 11, 2013

Button Buddies Banners

So now that the news of the Color Refresh has had some time to sink in, are you feeling sad about losing any of them?  I'm mostly excited about the new colors, but I'll definitely miss More Mustard.  That was one of my all time top three favorite colors, so that's a hard one for me.  But I was able to order some card stock and ink refill, so I'm all set.  And I know that as soon as I see all the new colors arranged in their new homes, I'll forget all about the colors we're losing (OK, except for More Mustard!)

But since we do have to say goodbye to some colors, I thought it would be a good idea to use them!  I have lots of Bashful Blue, which I honestly haven't used much recently (and apparently, neither has anyone else!)  It's great for baby cards, but that's generally all I use it for.  I remembered a few years ago there was a great Designer Series Paper package that used Bashful Blue, Real Red, and Old Olive.  And one of the prints had cherries on it.  It was a favorite of mine, and if truth be told, I still have a pack and a half in my stash.  So that was the inspiration for this card.  See, it's good for things other than baby cards!

Stamps:  Button Buddies (122735), Teeny Tiny Wishes (115370)
Ink:  Old Olive (126953)
Paper:  Bashful Blue (105120), Old Olive (100702), Real Red (102482), and Whisper White (100730) card stock, Polka Dot Parade DSP (126902)
Accessories:  Big Shot (113439), Perfect Polka Dot Embossing Folder (117335), 3/16" Corner Punch (119871), Brights Designer Buttons (119747) 

Tuesday, January 29, 2013

Button Buddies Flower

I got some sad news today.  I don't think I've mentioned this before, but I crochet a LOT.  I just need to be doing something with my hands while I'm watching TV, and that's the perfect thing to do.  But because of that, I now have a crocheting injury and have to stop for a few days.  :(  But that's the bad news.  The good news is that I have a box of stamping goodies scheduled to arrive today, and now I'll have more time to stamp!

This cute little card just makes me happy on a dreary day like it is today here in PA.  I love the flower in the Button Buddies set.  It looks great by itself, but I decided to jazz it up a bit by stamping it three times, then cutting out each layer.  Actually, the flower can be punched with the 1 3/4" scallop circle punch, so I really only had to cut two layers.  I topped it off with a button from the Neutrals Designer Buttons.  It's such a simple card, but sometimes simple is best.  This didn't take long to make, yet it's still cute.  Don't feel like you have to make an elaborate card every time you sit down to stamp.  Sometimes simple really is best!

Stamps:  Button Buddies (122735), Teeny Tiny Wishes (115370)
Ink:  More Mustard (126964), VersaMark (102283)
Paper:  Naturals Ivory (101849), Early Espresso (119686), and Very Vanilla (101650) card stock, Orchard Harvest DSP (retired)
Accessories:  Early Espresso Quilted Satin Ribbon (retired), 1 3/4" Scallop Circle Punch (119854), Adorning Accents Edgelits (125595), Big Shot (113439), Neutrals Designer Buttons (119743), Paper Piercing Tool (126189), Essentials Paper-Piercing Pack (126187), Paper-Piercing Mat (126199), Early Espresso Baker's Twine (123124), Early Espresso Stampin' Emboss Powder (128980), Heat Tool (129053), Stampin' Dimensionals (104430)

Friday, November 30, 2012

Snowy Hello

We've had snow here for most of the week, which is super unusual for us.  I've been determined not to get out the Christmas decorations until Dec. 1, but the snow and 24/7 Christmas music on pretty much every station is making it hard for me to wait.  I love Christmas, but I also love fall...I just don't see the need to rush out of one season and into the next.  But, I suppose that's exactly what I'm doing with this card, although maybe not?  I mean, there is snow on the ground here, and it's not technically a Christmas card.

This was my attempt at playing along with a Dynamic Duos challenge, but I was too late.  Can I just say that it is HARD to make a card with only two colors (plus neutrals, lest you question my math skills.)  I love the little Button Buddy snowman.  Instead of using buttons on him, I used Crystal Effects and sprinkled a little bit of Dazzling Diamonds glitter on top.  It's very subtle...so subtle that it doesn't even show up in the picture!  I stamped him with Staz-On black ink, too, so that he wouldn't bleed when I added the Crystal Effects. I actually stamped once directly on to the Marina Mist card stock, then again on white, and punched out the snow balls to add to the blue piece.  It gives him a bit of dimension and adds interest to the card.

Stamps:  Button Buddies, Teeny Tiny Wishes, Snow Swirled
Ink:  White Craft ink, Marina Mist Classic ink, and Staz-On Black ink
Paper:  Whisper White, Marina Mist, and Basic Black card stock
Accessories:  Snowburst embossing folder, Big Shot, 2 3/8" Scallop Circle punch, circle punches:  1 3/4", 3/4", and 1/2", paper-piercing tool, Crystal Effects, Dazzling Diamonds glitter, Bitty Banners Framelits, rhinestones

Tuesday, October 16, 2012

October Club Card #1


I'm not really much of a Halloween person, but I do love fall.  And fall means pumpkins.  These little pumpkins are so easy to make.  Just pick out a circle or oval punch, punch out three pieces, then with a little adhesive, stick them together.  So simple.  I did pop up the center piece with a Stampin' Dimensional, and sponged the edges a bit to give the layers a bit more dimension.

Stamps:  Teeny Tiny Wishes, Button Buddies
Ink:  Early Espresso, Old Olive, and Pumpkin Pie Classic Ink
Paper:  Crumb Cake, Very Vanilla, and Pumpkin Pie card stock, Early Espresso Core'dinations card stock
Accessories:  Labels Collection Framelits, Woodgrain embossing folder, Large Oval Punch, Small Oval Punch, 3/4" Circle Punch, sponge

Monday, September 17, 2012

September Club Cards, Part 1

So apparently I need to start every Monday post with an apology!  YIKES!  I can't believe how quickly the days are going by, and before I know it, another week has passed and I've only posted once!  I thought July was always our busiest month, but I'm now starting to think it's September.  Talk about CRAZY!  I'd like to think that things will settle down a bit in the next few weeks, but I'm not sure my calendar agrees.

There's been lots of stamping this past week, though, with club on Wednesday night, and the first of our Christmas Card Stamp-a-Stacks yesterday.  Even with a small group, it was a great afternoon, and lots of fun.  Those cards will be coming later in the week, as well as a peak at the cards for the remaining two Stamp-a-Stacks.

But first, here's one of the cards we made on Wednesday night.  This one is a telescoping card.  I've been seeing lots of these lately, and wanted to give it a try.  We used Button Buddies, since that's my latest obsession.  I wanted it to be simple, since there were a lot of us making this at once.  But the simplicity is nice with this card, because of all the layers. 

I think this would be the perfect technique to use for a snowman card.  But it's only September...no talk of snow or snowmen yet!

Stamps:  Button Buddies, Day of Gratitude
Ink:  Crumb Cake, Early Espresso, More Mustard, and Cajun Craze Classic Ink
Paper:  Crumb Cake, Early Espresso, More Mustard, Cajun Craze, and Very Vanilla card stock
Accessories:  Scallop Circle Die, 3 1/2" Circle Die, 3" Circle Die, 2 3/8" Scallop Circle Punch, 1 3/4" Circle Punch, 1 1/4" Circle Punch, Brights Buttons, Linen Thread, Sponge, Silver Brads, Paper-Piercing Tool and Mat


Monday, September 10, 2012

Simple Snail

I feel like apologies are needed for so many reasons...I meant to post this on Friday, but we were scurrying around packing to leave to go to my cousin's wedding.  We were two hours into the trip when I realized that I hadn't posted it.  That was also around the time when my daughter announced that she had not packed shoes to wear to the wedding.  I got to make a trip to the mall on Saturday morning to find some sandals for her.  The good news about that was that we did find a pair, and they were 50% off the clearance price! Hooray for good deals!  And, I should add, the wedding was lovely.  He was the last of all my cousins to get married, and I'm so happy for them! 

My other apology is for the photography.  There is a really cool element on this card, and the poor photography really doesn't show it off.  This little snail is from the Button Buddies set.  I love how each image works well alone, but looks even better with a button on top.  But what do you do if you don't have the right colored button?  This was the question I was asking myself, because there are no Tangerine Tango buttons.  The simple solution is Crystal Effects.  I simply stamped onto a piece of Tangerine Tango, punched out the shell part of the snail using the 3/4" circle punch, then used Crystal Effects on top.  The CE takes awhile to dry, so be sure to do that first, and be prepared to set it aside for a while and go fold some laundry.  Or, if you are lucky enough not to have clothes waiting in your dryer, you can just make more cards while you wait. :)

While it might be tempting to do the Crystal Effects first, but it's important to do that after punching.  Once dry, the CE will make it difficult, if not impossible to fit the card stock into the punch.  Also, don't run your dry CE through your Big Shot unless you want it to be flattened.  Just ask me how I know. :)

Stamps: Button Buddies
Ink:  Tangerine Tango Classic Ink
Paper:  Floral District DSP, Naturals White, Tangerine Tango, and Lucky Limeade card stock
Accessories:  Labels Framelits Collection, Paper Piercing Tool, Pack and Mat, Lucky Limeade Ruffled Ribbon, Stripes Embossing Folder, Big Shot

Wednesday, September 5, 2012

More Button Buddies


This card is sort of a cross between summer and fall.  I love mums, which is what this flower reminds me of, but the bright sunny colors are more summer-like.  And a cross between summer and fall is exactly what it's been like around here lately.  It's been cloudy, but hot.  School has started, so it feels like fall, yet the extreme humidity tells me that it's still summer. 

This was a quick card to pull together, using DSP from both the Polka Dot Parade and Floral District collections.  The Pumpkin Pie and Daffodil Delight work so well together, and the white embossing powder on the happy birthday tag pops off of the yellow.  For some reason, the seam binding ribbon is a little more see-through in the picture than in real life, but ruffling up the ribbon would certainly take care of that.  It's fun to look at finished cards and think about ways to change up one of two elements...it will often result in a completely different look.  You can make simple changes to the same basic layout and end up with a completely different card.  Try it sometime!

Stamps:  Button Buddies, Itty Bitty Banners
Ink:  Pumpkin Pie Classic Ink, VersaMark
Paper:  Naturals White card stock, Floral District and Polka Dot Parade DSP
Accessories:  Daffodil Delight seam binding ribbon, Pumpkin Pie 1/4" grosgrain ribbon (retired...1/8" taffeta ribbon or even a strip of cardstock make great substitutions!), Scallop Circle punch, Brights Buttons, White Baker's Twine, Bitty Banners Framelits, Big Shot, heat tool, White embossing powder

Wednesday, August 29, 2012

Button Buddies


Please excuse the horrible photography!  I was in a rush and thought it would be better to post something rather than wait for a good picture.  It's hard getting back into the routine of school, and we aren't even doing every subject yet!  But this year is all about making my 5th grader far more independent, so hopefully my days won't seem quite as busy once she's doing more of her work on her own.  At least I hope that's the case.  I'm probably fooling myself.

Anyway, this is a little 4"x4" card that uses the set Button Buddies.  I've had my eye on this set since it came out last year, and while I always thought it was cute, I just couldn't seem to bring myself to buy it.  But I finally caved in, and I'm having lots of fun playing with this set.  You can expect to see lots of cards featuring this set.  It's very cute, and I like how our buttons coordinate with each image.

This one is probably my least favorite of them all, but I thought it would look great with the Summer Smooches DSP.  Well, that and the fact that I only have Brights Buttons in my drawer right now, and I wanted the paper and buttons to coordinate! :)  The buttons add a little extra to the card, and often that's all it takes to take the card from nice to wow.

Stamps:  Button Buddies, Itty Bitty Banners
Ink:  Island Indigo and Lucky Limeade Classic ink
Paper:  Island Indigo, Daffodil Delight, Lucky Limeade, and Whisper White card stock, Summer Smooches DSP
Accessories:  Chevron embossing folder, Labels Collection Framelits, Bitty Banners Framelits, Brights Buttons, Linen Thread, sponge