Monday, September 30, 2013

More Cards from Friends

I thought I'd share a few more cards I received from my stamp club members.  It has been so nice to find these cards in the mail, especially when all I normally get is junk and bills!


Friday, September 27, 2013

Yippee-Skippee {Label Card Thinlit}

I just can't get enough of these Thinlit dies...flip cards are so much fun to make!  This one features Sweater Weather Designer Series Paper.  If I've said it once, I've said it a thousand times, I loooove plaid!  I think the Crushed Curry plain in this pack of DSP is my favorite. 


Tips & Tricks

  • I made this card using the Label Card Thinlit Die.  Use the coordinating Labels Collection Framelits along with it to create additional layers.  They're a perfect match!
  • When dying the Simply Pressed Clay, don't forget the gloves!  Of course, if you enjoy walking around with stained fingers, feel free to ignore my advice. :) 
Supplies

Stamps:  Yippee-Skippee
Ink:  Chocolate Chip and Crushed Curry Classic Ink, Tangerine Tango and Chocolate Chip ink refills
Paper:  Sweater Weather DSP, Very Vanilla card stock
Accessories:  Simply Pressed Clay and Molds, Linen Thread, Big Shot, Label Card Thinlit Die, Labels Collection Framelits, Magnetic Platform (!), Sponge

Wednesday, September 25, 2013

Season of Style Washi Tape Card

I know, I know, it's barely even fall, but yes, this is a Christmas card.  I broke out some retired items for this one, including the glitter and the "Merry Christmas" stamp.  It's my favorite Christmas sentiment stamp, and I pretty much use it every year, even if it is retired.

Tips & Tricks

  • Washi Tape is so easy to use!  Don't be afraid to just stick it to your card stock.  It's easy to reposition if you don't like how it looks.  In fact, I moved the Crumb Cake piece on this card several times until I had it perfectly spaced.
  • Who doesn't love a good glittery card?  Heat and Stick Powder is the secret to adhering glitter to a stamped image.  Simply stamp in VersaMark, then "emboss" using Heat and Stick Powder.  As soon as you set the Heat Tool aside, sprinkle the glitter on the image.  The glitter will stick and look fabulous!

Supplies

Stamps:  Scentsational Season (retired), Christmas Greetings (retired)
Ink:  Cherry Cobbler and VersaMark
Paper:  Cherry Cobbler, Old Olive, and Whisper White card stock
Accessories:  Big Shot, Perfect Polka-Dots Embossing Folder, Holiday Collection Framelits (retired), Essentials Paper-Piercing Pack, Tool, and Mat, Season of Style Designer Washi Tape, Heat Tool, Heat and Stick Powder, glitter, 1-3/4" Circle Punch

Tuesday, September 24, 2013

Cards from Friends

This has been such a difficult year, as I've lost three grandparents in the past nine months.  It's so strange to think that I don't have any of my grandparents around anymore, but am so very grateful that all of them were such an important part of my life for so many years.  It has been very comforting to know that so many people have been thinking of and praying for me and my family.  I wanted to share some of the lovely cards I received this past week. 


Aren't these beautiful?  I have been so blessed by each one!

Friday, September 20, 2013

Emboss Resist Fall Card

No one enjoys sending sympathy cards, but I've realized this past year just how important it is to send them.  It means so much to receive one, knowing that others care that you are grieving.

I pinned this card by Lisa Young a while ago, and decided to try a variation on it.  While I love French Foliage, I don't own that set, and thought that Gently Falling would be a great substitute.  I changed up the colors a bit, too

Tips & Tricks

  • Emboss resist is such an easy technique.  I first embossed the leaves with clear embossing powder on Very Vanilla card stock.  Then I sponged various ink colors over the entire surface of the card stock.  After applying every color, I took my sponge and rubbed Crumb Cake ink over the entire thing.
  • Need texture on your card?  Try the faux suede technique, as I did here with the Cajun Craze and Soft Suede strips.  Simply crumple up the card stock until it easily peals apart into two layers.  The inside part will be kind of fuzzy, and the outside part isn't.  Just choose which side you prefer!  Hint:  SNAIL doesn't adhere well to the fuzzy side, so you may need to use a different adhesive.  I used Sticky Strip.
  • Did you know you can stamp on clay?  After dyeing this piece, I rolled it out (like cookie dough!) and stamped the little leaf on it.  Once it's dry, it's easy to trim, and it adds a unique element to this card.

Supplies

Stamps:  Gently Falling, Teeny Tiny Wishes
Ink:  Cajun Craze, Crushed Curry, Cherry Cobbler, Crumb Cake, and Soft Suede Classic Ink, VersaMark
Paper:  Cajun Craze, Soft Suede, and Very Vanilla card stock
Accessories:  Clear Embossing Powder, Heat Tool, Linen Thread, Simply Pressed Clay, Sponge

Wednesday, September 18, 2013

Two New Photopolymer Sets

Love photopolymer?  You're in luck...Stampin' Up! just released two new sets, and they are super-cute.  As a former history/social studies teacher, I love the looks of that map set!  Actually, these are both great sets, as the images in the Greeting From set are adorable.  I love that cactus!  To get a better look, click on the links below.  Want to place an order?  Just email or call me and I can help you!  Or, visit my online store, here.

Greetings From photopolymer stamp set

Map it Out photopolymer stamp set


Monday, September 16, 2013

Purple Butterflies {Clear Block Technique}

I hope you'll forgive me for the short post today.  My grandfather passed away this morning, and I'm just not feeling like I have that much to say.  But I did want to post a card, which is my take on this one, by Vicky Hayes.

Purple was my grandmother's favorite color, so in a way, this is fitting for today, as he's now been reunited with her.  They loved each other so much that he couldn't even live four months without her.  And I am so grateful to have had these amazing people in my life!


Friday, September 13, 2013

Gently Falling

After a few days of hot and humid weather, it's finally starting to feel like fall around here.  So what better card for today than one that looks like fall!  I grew up in the woods amidst sugar maple trees, which turn the most gorgeous, brilliant color of orange-red.  This card sort of makes me think of those trees that line the country road leading to my house.

Tips & Tricks

  • Want the woodgrain to stand out more when using Woodgrain Embossing Folder?  Rub the ink pad of the same color over the embossed card stock.  The ink will only stick to the embossed design and will make it pop.
  • When using the Gently Falling stamp set, which is a two-step stamp, I always stamp off once before stamping the "inside" of the leaf.  I only do this with this set, and I really like the more subtle look it gives these leaves!

Supplies

Stamps:  Gently Falling, Teeny Tiny Wishes
Ink:  Early Espresso, Soft Suede, and Cajun Craze
Paper:  Early Espresso, Cajun Craze, and Very Vanilla card stock
Accessories:  Woodgrain Embossing Folder, Big Shot, Neutral Designer Buttons, Linen Thread

Wednesday, September 11, 2013

Another Flip Card! {Circle Card Thinlits Die}

I am in love with the new Circle Card Thinlits Die!!!  These cards are so much fun to make!  And even though it's only early September, I decided to make a Christmas card.  Trust me, I'm in no hurry for winter, but I do love the wintery look of this card.  From the front, it looks like any other flip card, but when you open it...
it opens!  Just cut your card stock a little longer and you'll have an extra fold so your card opens.

Tips & Tricks

  • Adhere your Designer Series Paper before running through the Big Shot and you'll have that semi-circle cut out for you.  OR...
  • Place your DSP under the cut out card and trace along the semi-circle with a pencil, then cut with your paper snips.
  • The Designer Series Paper stacks in the Holiday Catalog are a fantastic value!  For only $6.95, you get 48 double sided sheets (4 designs).  If you are planning to mass-produce Christmas cards, these stacks are the way to go!  

Supplies

Stamps:  Warm Winter Wishes (retired, but can easily be substituted with Festive Flurry...and be sure to get the coordinating Framelits so you don't have to cut those snowflakes out by hand!), Christmas Greetings (retired)
Ink:  Silver, Pool Party
Paper:  Basic Gray, Whisper White, and Pool Party card stock, Winter Frost DSP stack, Silver Glimmer Paper
Accessories:  Rhinestones Basic Jewels, 2-1/2" Circle Punch, Circle Card Thinlits Die, Paper Snips

Monday, September 9, 2013

Designer Typeset {Photopolymer Stamp Set!}

I have a very simple, CASEd card today.  There's nothing wrong with copying another person's card!  I saw this card by Penny Smiley recently, and thought it was so cute.  This card was my attempt at hers, and I kind of missed the mark.  Oh well, I think it will still work.  I decided that this would be a fun one to send to a friend of mine, who teaches my kids Spanish.  So I added the little "Gracias" down at the bottom...one of the main reasons I bought this set.  You can spell anything you want!

Tips & Tricks

  • The pennant stamp in this set fits on Clear Block I...for a draping look, simply bend the stamp!  In my opinion, that's one of the biggest benefits of photopolymer stamps!
  • When spelling out a word, you have two options...place all the letters on the clear block at once and stamp one time, or stamp each letter.  For this card, I stamped each letter individually.  When placing the letters on the block at the same time, the spacing between letter will be wider than shown here.

Supplies:

Stamps:  Designer Typeset Photopolymer Stamp Set
Ink:  Strawberry Slush, Calypso Coral, So Saffron, and Wild Wasabi Classic Ink
Paper:  Naturals White and Strawberry Slush card stock
Accessories:  Paper Snips

Friday, September 6, 2013

First Flip Card!

If you pay any attention to what's going on in the Stampin' Up! world, you'll know that these flip cards are all over the internet right now.  That's thanks in part to the fact that Stampin' Up! has made it incredibly easy to make these fun cards with the release of the new Thinlits Card Dies.  These dies are like Framelits, only better!  They will score and cut your entire card, and all you need to do is fold it and embellish.

This is my first attempt, and admittedly, it's pretty simple.  But sometimes simple is great...the patterns on the (retired) Designer Series Paper are busy enough!  Each set comes with loads of extras, like this little "hi" sentiment.  I embellished it a bit with some Simply Pressed Clay, dyed in Cajun Craze.  It made for a fun dot for the "i".

Here's what the card looks like when it's opened...I left the circle blank as I plan to write a little note there.  This interactive card will be so much fun to receive in the mail!
Tips & Tricks

  • Pair these dies with the Magnetic Platform for the Big Shot.  While this isn't available at the moment, it will be soon!  In the meantime, use a Post-It note or some painter's tape to hold the die in place while running through the Big Shot
  • Embellishing is easy with all the extra goodies included with this die.  Not only that, but our 2 1/2" Circle Punch is the perfect accompaniment.  Just slightly smaller than the circle on the card, any card stock punched with it will look perfectly matted on your card!
Supplies

Ink:  Cajun Craze Ink Refill
Paper:  Comfort Cafe DSP (retired), Soft Suede, Summer Starfruit, and Midnight Muse card stock
Accessories:  Big Shot, Circle Card Thinlits Die, 2-1/2" Circle Punch,  Summer Starfruit 3/8" Stitched Satin Ribbon, Simply Pressed Clay and Molds

Wednesday, September 4, 2013

Gently Falling


I'm not sure what it's like where you live, but this is the perfect card today.  I have the window open to let in the (very) crisp air, just heard the school bus drive by for the first time, and there's a cup of tea steeping in my kitchen.  It feels like fall today.  I LOVE fall...it's my favorite season.  And I love leaves, because leaves mean fall to me.  So on this first fallish day, a card with leaves is the perfect thing!

Tips & Tricks
  • Ruffled ribbon is beautiful, but ruffled crochet trim makes it tricky to when trying to adhere those leaves.  Use a double layer of Stampin' Dimensionals on either side of the crochet trim to make the leaves stick
  • Two-step stamps can be frustrating to line up.  Clear mount stamps are a great solution, as the clear block makes it easy to see the first step.  If you're not a clear mount fan, use the Stamp-a-ma-jig!  Or better yet, don't sweat it...there's not need for perfection with these leaves, especially if cutting them out!

Supplies

Stamps:  Gently Falling, Thoughts & Prayers
Ink:  Soft Suded and Tangerine Tango Classic Ink
Paper:  Sweater Weather Designer Series Paper, Naturals Ivory,  Soft Suede, and Crushed Curry card stock
Accessories:  Scallop Oval and Large Oval punches, Pearl Basic Jewels, Crochet Trim, Sticky Strip, Stampin' Dimentionals


Monday, September 2, 2013

Papillion Potpourri {plus a promotion!}

Wow, there's a lot of alliteration in that post title!  And good heavens, it's been a week since I last posted.  I NEVER intend to go that long.  Unfortunately, an elbow injury kept me from stamping and limited my computer use.  I'd love to say it's all better, but it's an ongoing thing that just sometimes gets really bad.  And last week was one of those times.  I'm so sorry for my long absence!

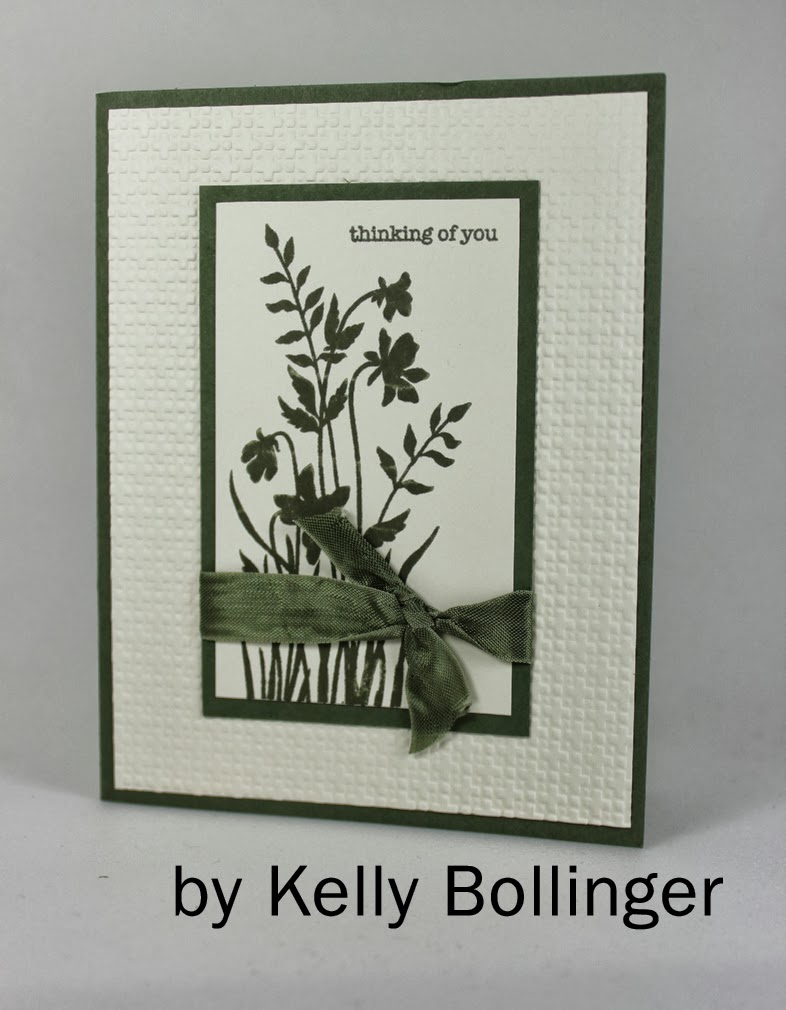
And while I'm apologizing, sheesh!  Sorry about this horrible picture!  I'm having some camera issues.  Actually, the issue is more with the user than the camera itself.

I'm not a big watercolorer (yes, it's a word...I just made it up), but I love to watercolor these butterflies.  I think these are really easy to watercolor, and anyone can make these butterflies look beautiful.  Pair them with the coordinating Elegant Butterfly and Bitty Butterfly punches, and you just can't go wrong!

Tips & Tricks

  • Squeeze the lid of an ink pad while shut, and you'll end up with ink on the inside of the lid.  Grab an Aquapainter and dip it in for easy watercoloring...no special paints needed!
  • Sticky Strip is your best friend when ruffling ribbon...don't bother with any other adhesive as it just won't stick long term.
  • No need to fussy cut your butterflies when you can just punch them with coordinating punches! (see below)

Promotion

  • Get 15 percent off when you buy the Papillion Potpourri stamp set (clear or wood mount) and the Bitty Butterfly punch!


  • Clear-Mount Butterfly Bundle     $26.27
  • Wood-Mount Butterfly Bundle     $29.67


Call or email me if you'd like to order this great bundle...it's only available until September 30!